1. Introduction
Airwheel A3 is the state-of-the-art means of transportation adopting aerospace attitude control theory, fuzzy software algorithm, and gyroscope system to maintain balance by leaning forward and backward. Riders can control the vehicle to go forward, accelerate, decelerate, brake, etc. by leaning forward or backward. Also, turning A3 is achieved by simply turning the handlebar which will cause the differential of rotational speed on both wheels, e.g. when the handlebar is turned anti-clockwise, the rotational speed on the right wheel will be faster than that on the left wheel, thus the unit will turn left. In the meantime, the turning-sensing system will be activated (turn light will flash).
Being green and eco-friendly, Airwheel A3 can be stowed in the trunk of a car, facilitating a low-carbon travel style.
-
![Airwheel A3 manual]()
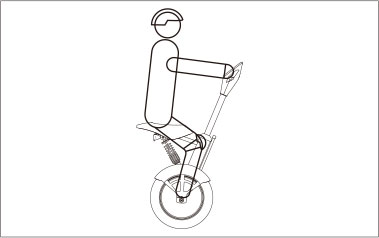
Forward
-
![Airwheel A3 intelligent scooter]()
Accelerate
-
![Airwheel A3 two-wheeled scooter]()
Decelerate
-
![Airwheel A3 self-balancing scooter]()
Brake
-
![Airwheel A3 saddle-equipped]()
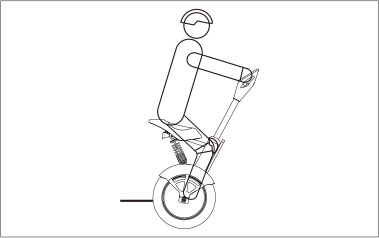
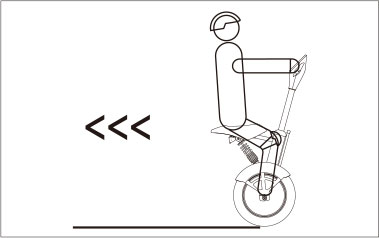
Backward
2. Installation
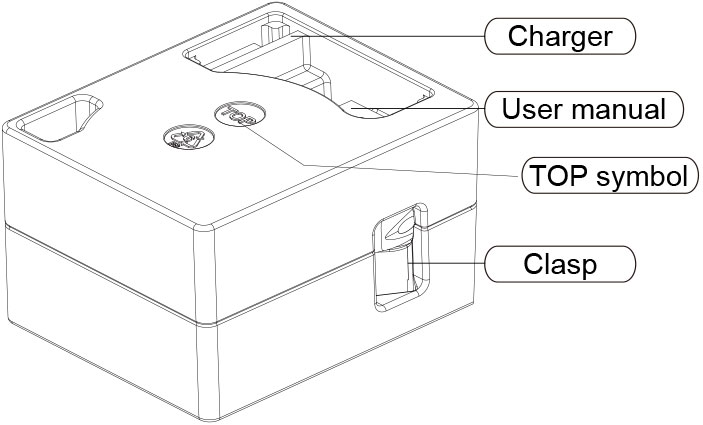
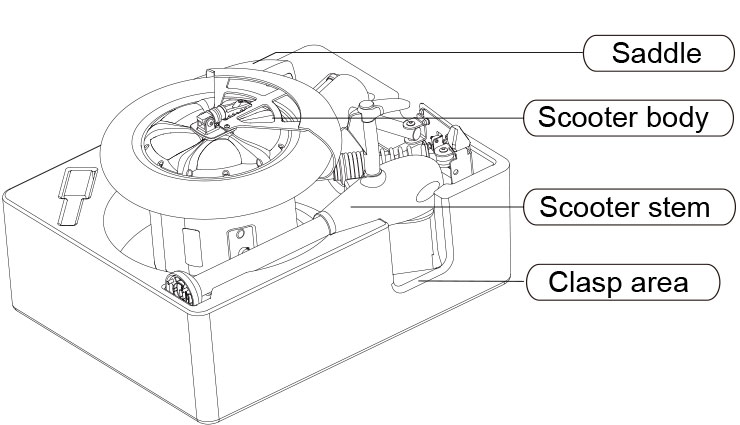
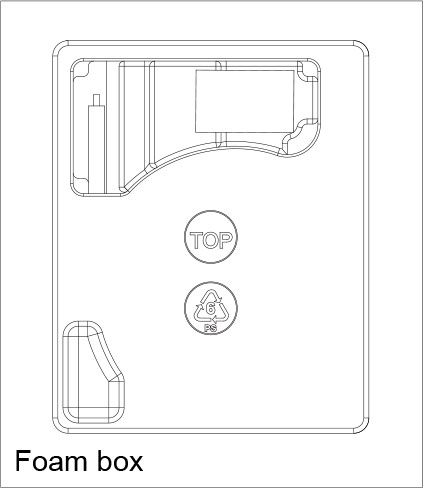
After receiving the package, hold the two clasps and place the box vertically on the ground. Open the box and make sure the foam box inside is placed with the Top side upwards. Open the small cover to take out user manual and charger, then open the big cover to take out the scooter stem. When taking out the scooter stem, lift it firstly to the height of the scooter body, then move it horizontally through the clasp area. Take out the saddle and then lift up the foam box. Pull the scooter body carefully towards the ground. When the scooter body tilts to a certain angle, it will roll out.
2.2. Check Packing Contents
After opening the packing box, take out the scooter stem and the saddle. Then take out the scooter body.
2.3. Preparation
Before installation, please find in the standard accessories a set of 2 hexagon wrenches. Please retain this tool kit, it is useful for maintenance and transportation of the unit. As metric standard tools, you may find replacement at home or in a hardware store.
A pair of work gloves is recommended to protect your hands from dirt and scratches.
2.4. Installation
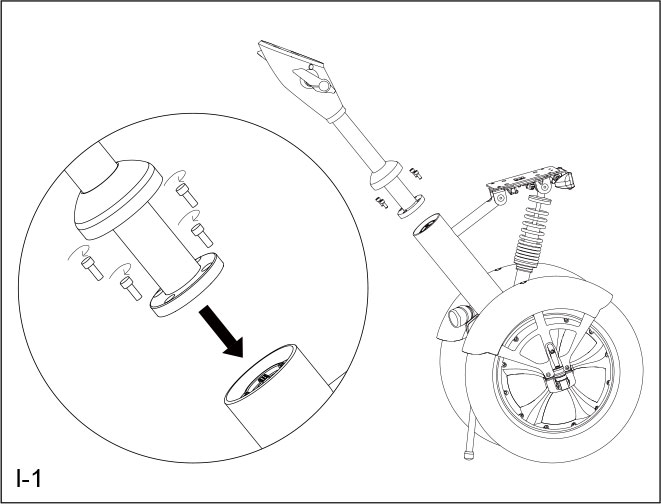
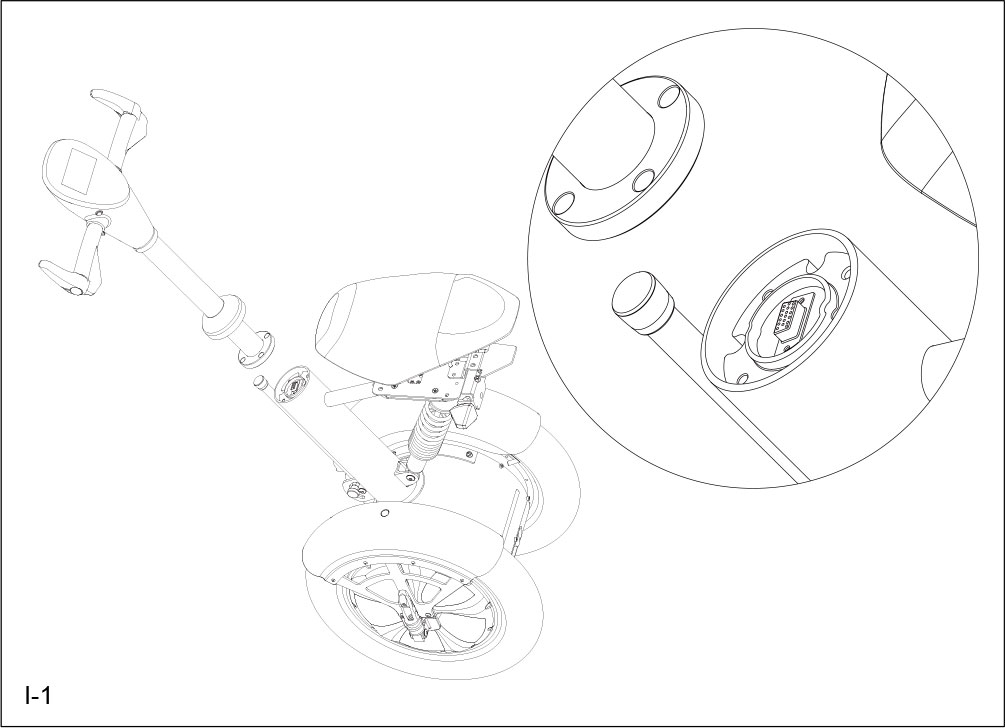
1. Take out the scooter stem and put down the kick stand (see 5.3) to fix the scooter body. Insert the connector below the stem into the 15-pin plug, then fix them with 5 M6*20 screws and the hexagon wrench. (see I-1)
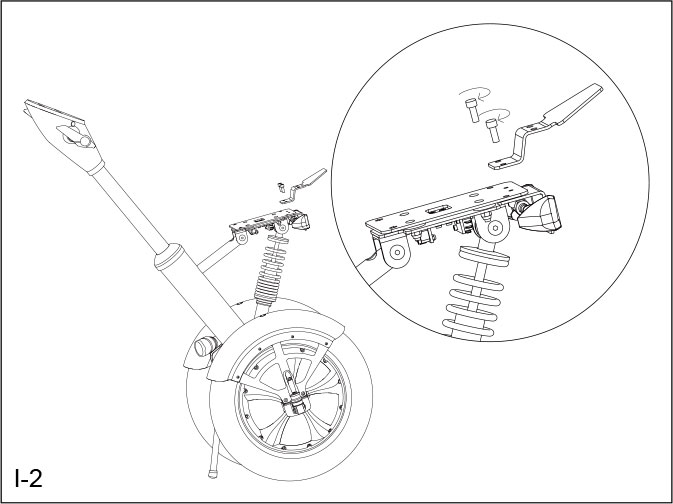
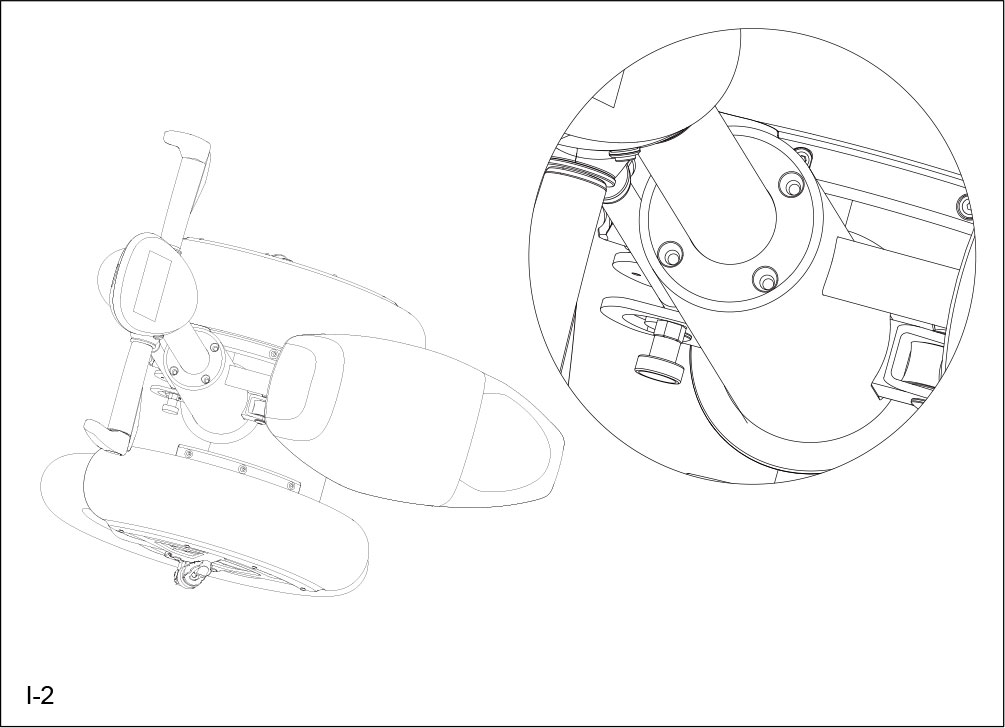
2. Fix the front and rear supporting plates of the saddle with 2 M6*20 screws. (see I-2)
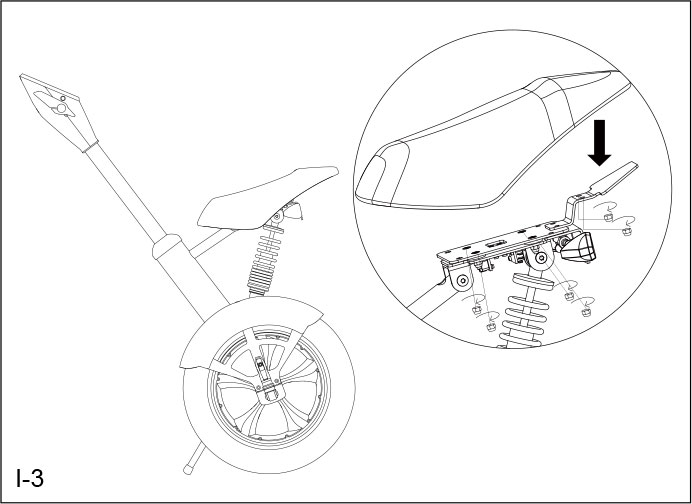
3. Fix the saddle on the scooter body with 6 M6 screws. (see I-3)
3. Safety
There are risks of riding or driving any vehicle. Airwheel A3 is no exception. Please make sure this manual is read through and fully understood before getting started, and be alert when riding.
Important Note:
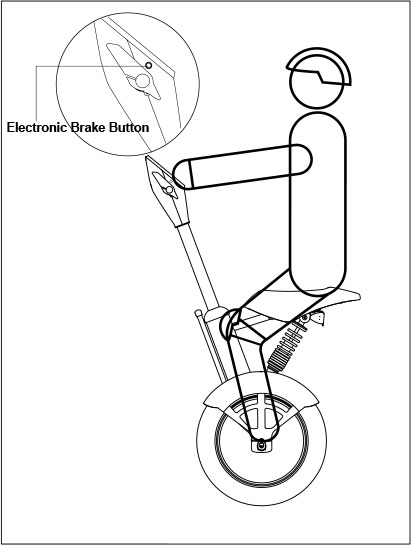
1. Sharp acceleration or deceleration or speeding via overly leaning forward or backward are strictly forbidden. When power level indicators show only one bar left, riding is not recommended. When it happens during the riding, please keep a low speed and recharge the Airwheel as soon as possible. Use the electronic brake button with special caution before getting proficient control of the Airwheel or under uncontrollable situation.
2. Do not ride Airwheel when risking any accidental falls. Safety goes first.
Attention:
1.Do wear helmet, gloves, elbow/knee pads or other necessary protection gears.
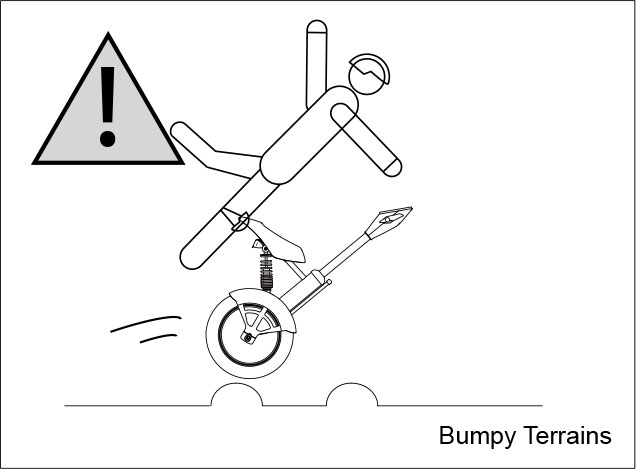
2.Do not ride Airwheel on rough or bumpy surfaces,such as muddy or gravel roads.
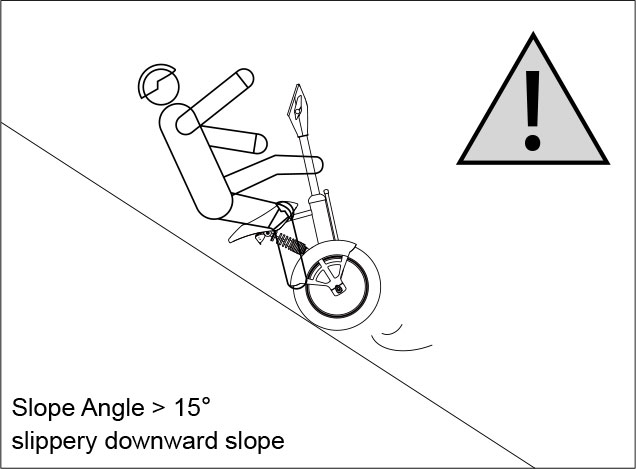
3.Do not ride Airwheel on wet, slippery surafces, especially icy ones.
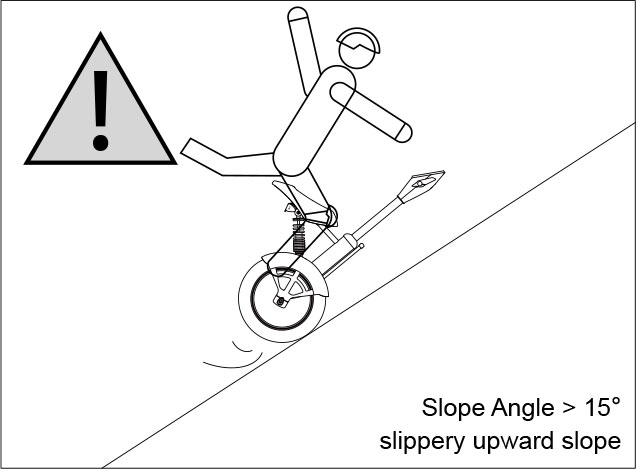
4.Do not ride Airwheel on slopes of over 15° gradient.
5.Do not allow children under 15 or the aged above 60 to ride Airwheel.
6.Drunk or drug riding Airwheel is prohibited.
7.Do not allow persons with high blood pressure,cardiac-cerebral vascular disease, or other high risk diseases to ride Airwheel.
8.Do not ride Airwheel in extremely cold winter.
9.Do not ride Airwheel in the rain.
10.Do keep slow speed when riding Airwheel on slopes.
11.Do not ride Airwheel in other unadvised situations caused by either personal or objective reasons.
3.1. Safety Guidelines and Riding Etiquettes
1.Please learn and abide by local laws and regulations when riding Airwheel A3. Be careful and considerate of others, and take precaution of accidents and collisions.
2.Please ride at safe and proper speed and make sure your Airwheel is under control.
3.Respect pedestrians and avoid startling pedestrians, especially children. When approaching from behind, announce yourself and slow down to walking speed when passing.
4.Keep a safe distance from other Airwheel A3 riders and always avert from obstacles. Unless there's ample space for other pedestrians, please do not ride side by side with fellow Airwheel players.
5.Please avoid riding in poor light unless necessary, and make sure in this scenario you ride at slow, safe speed with care and geared with mounted driving lights if possible.
6.Please relax your body when riding, bend your knees and elbows slightly and look straight forward.
7.Riding backward can be dangerous. For emergency, ride slowly backward in necessary avoidance of obstacles.
This device complies with part 15 of the FCC Rules. Operation is subject to the following two conditions: (1) This device may not cause harmful interference, and (2) this device must accept any interference received, including interference that may cause undesired operation.
FCC ID: 2AHQH-CHJ-C70K2
FCC statement
This equipment has been tested and found to comply with the limits for a Class B digitaldevice, pursuant to Part 15 of the FCC Rules.These limits are designed to provide reasonable protection against harmfulinterference in a residential installation. This equipment generates, uses and canradiate radio frequency energy and, if not installed and used in accordance withthe instructions, may cause harmful interference to radio communications.
However, there is no guarantee that interference will not occur in a particularinstallation.
· If this equipment does cause harmful interference to radio or televisionreception, which can be determined by turning the equipment off and on, theuser is encouraged to try to correct the interference by one or more of thefollowing measures:
— Reorient or relocate the receiving antenna.
— Increase the separation between the equipment andreceiver.
— Connect the equipment into an outlet on a circuitdifferent from that to whichthe receiver is connected.
— Consult the dealer or an experienced radio/TV technician for help.
RF exposure warning
· The equipment complies with FCC RF exposure limits set forth for an uncontrolled environment.
The equipment must not be co-located or operating in conjunction with any other antenna or transmitter.
3.2. Initiative Safety Measures
Please read through this manual and make sure it is fully understood.
● Do not allow others try your Airwheel A3, unless he/she has read through this manual.
● Please do wear safely gears while riding Airwheel A3. Make sure your helmet is comfortably fit and qualified for safety protection. Riders may wear glasses, elbow/knee pads according to their own experiences.
● Please do not ride Airwheel A3 when you are feeling unwell or not able to follow the instructions in the manual.
● Please stop riding immediately when Airwheel A3 starts alerting for low battery or over speed. Charge your Airwheel in time to ensure safe and smooth use.
● Make sure to power off Airwheel before moving it. Do not lift Airwheel A3 on the wheel in case your fingers get caught between the tire and case.
● Check your Airwheel A3 carefully for any loosened or damaged parts every time prior to use and do not ride before proper troubleshooting.
● The maximum speed of Airwheel A3 is 17km/h. High speed may bring risk to the riding. For safety concern, please ride with steady speed.
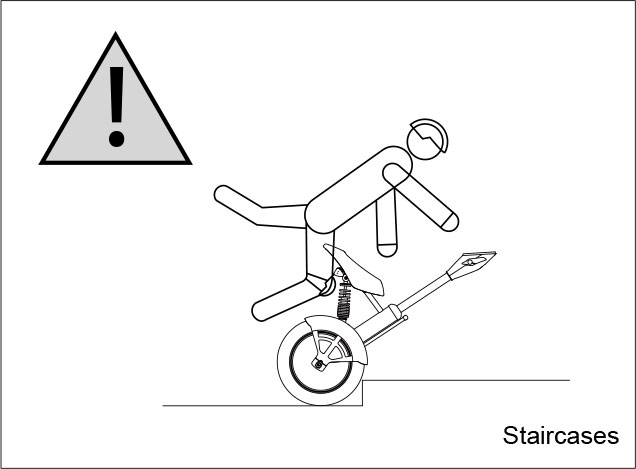
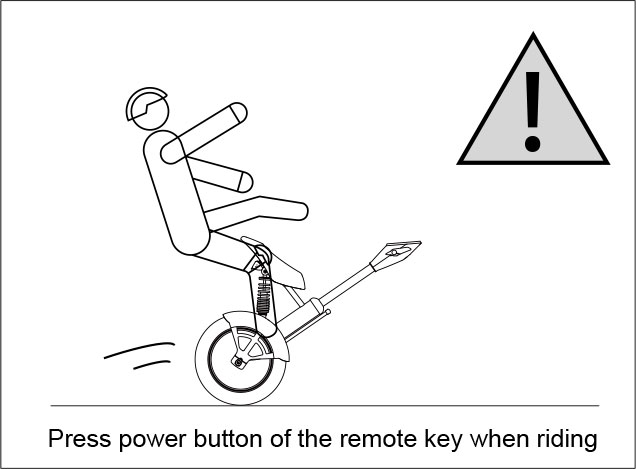
3.3. Warned Scenarios
4. Learning Tips
4.1. Before Getting Started
For first-timers, be sure to equip yourself with comfortable sportswear and sneakers. Warm up your body and keep your body agile. Considering the average human athletic skills, the height of pedal is set 247mm from ground only, which guarantees your safety in case of falling over. A Helmet, gloves, knee and ankle pads are also essential for first-timers. To start, please bring Airwheel A3 to open space and watch out for obstructions and bumpy terrains.
4.2. Learning Tips
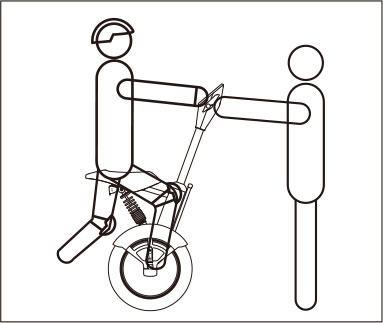
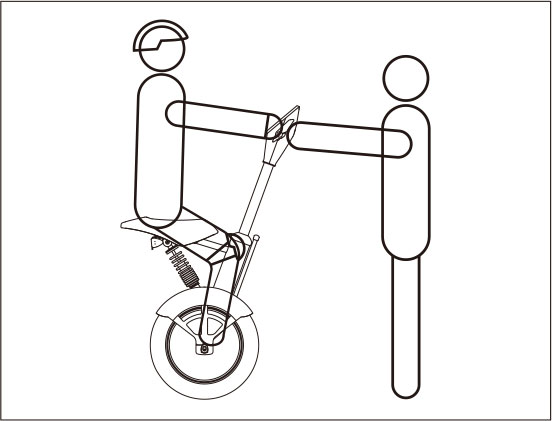
Learning Airwheel A3 is much easier than learning how to ride a bicycle. Most starters only needs 3 minutes to get a hang of it. You'll need a learning partner standing in front of Airwheel A3 and holding the handlebar with both hands to help stabilize the handlebar for the first time.
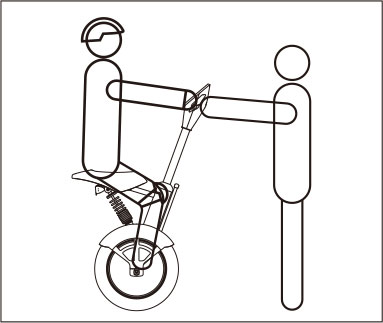
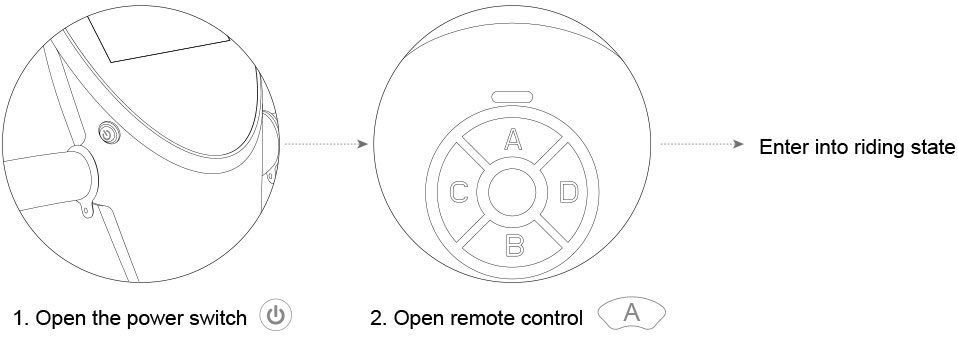
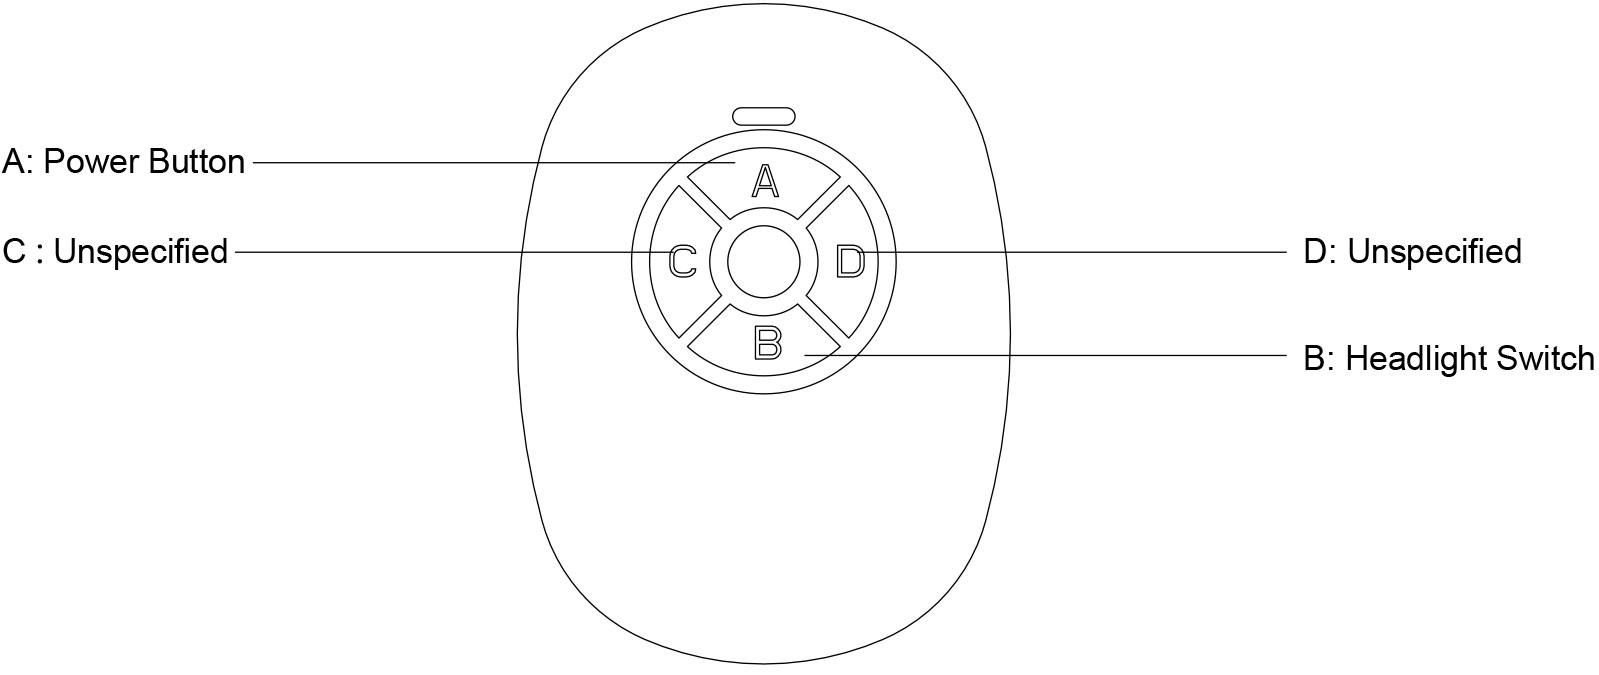
● Turn on power switch, then press A on the remote control. Fold up the kick stand.
● Sit on the saddle and put down the paddles at each side. Hold the handlebars and look straight forward.
● Keep calm and relaxed and look forward as shown below.
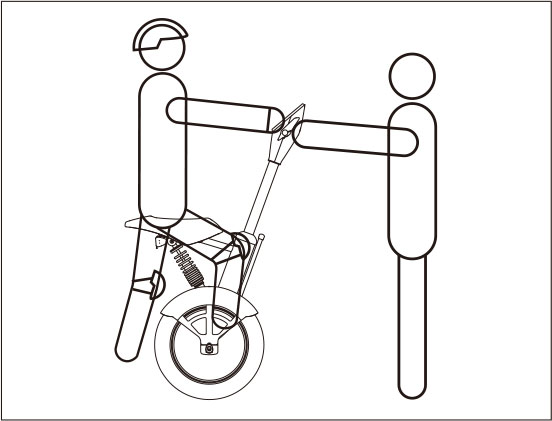
4.3. Go Forward and Backward
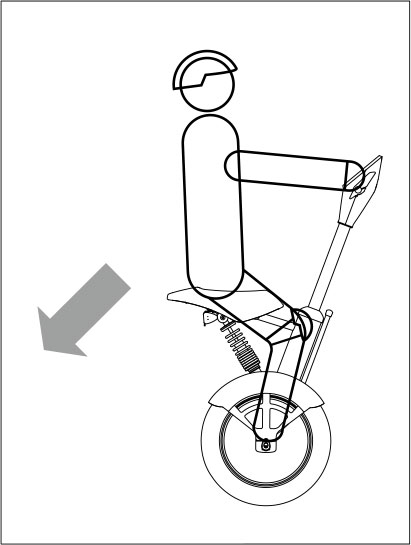
Push the handlebar gradually forward to feel the acceleration and stopping of Airwheel A3 and then restore the status quo ante to feel the acceleration and deceleration. Steer at a slow speed and feel the motion controlled by your center of gravity.
Look back and lean gradually backward to control Airwheel A3 fall back, and then restore the status quo ante to feel the deceleration and brake. Keep practicing and pay attention to the wall and other obstacles to avoid falling over.
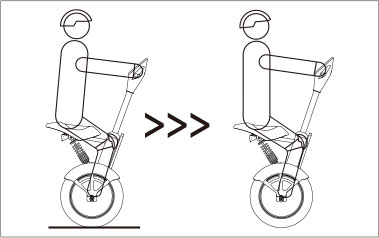
4.4. Stop and Brake
Attitude brake
Stop the unit by shifting your center of gravity to the opposite direction of travelling:
When the unit is in motion, gradually lean backwards to stop the unit.
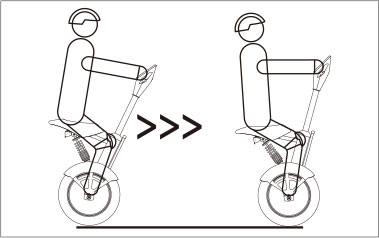
Electronic brake
During riding, press down the electronic brake button to decelerate or brake. Release the button when the unit stops.
Starters can choose an open space to practice stopping unit and keeping balance.
Note: Device may tilt forward or backward when the Electronic Brake button is pressed down. The user should stay calm, keep balance and be careful.
![Airwheel A3 USER MANUAL]()
Standard Brake Manner
![Airwheel A3 industry design]()
Electronic Brake
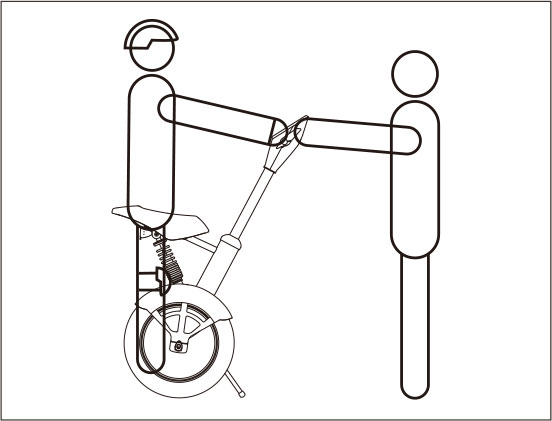
4.5. Make Turns
Airwheel A3 will conduct turns as per the movement of the handlebar. Push the handlebar left or right to make turns on the corresponding direction.
1. First practice turning on one spot by moving the handlebar gradually towards the direction you wish to turn to. Airwheel A3 will turn on the spot sufficiently to the desired extent until you restore the handlebar. Keep practicing to get the skills.
2. Turn when in the motion. After getting a hang of going forward, backward and turning on one spot, you may try to make turns while going slowly forward. Keep your knees slightly bent and prepare to lean toward the turning direction in accordance with the control shaft. Keep practicing.
You may ask your learning partner to help hold the handlebar when getting off Airwheel A3 for the first time.
Instructions:
1. Hold onto the handlebar and step on the ground with two feet. Then fold up the pedals and get off the unit. Turn off the power and put down the kick stand.
2. When moving off the saddle of Airwheel A3, do hold your hands on the handlebars before powering off the unit. Otherwise, Airwheel A3 will slip forward and cause potential risks.
4.7. Important Note for Starters
Warnings
1. Starters under 18 or over 45 are supposed to find yourself learning partners.
2. Make sure to check the power level and tire before riding.
3. Please control speed before riding smoothly.
4.8. Download APP
Calibration steps
1. Use App to lock the unit.
2. Please operate according to the tips of APP.
3. After hearing the long beep sound, reboot the unit to complete calibration.
Scan the QR code to download APP
*Support Android 4.3 or higher, iOS 7.0 or higher.
5. Usage
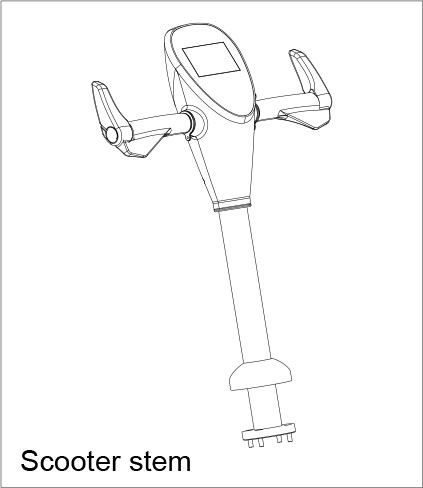
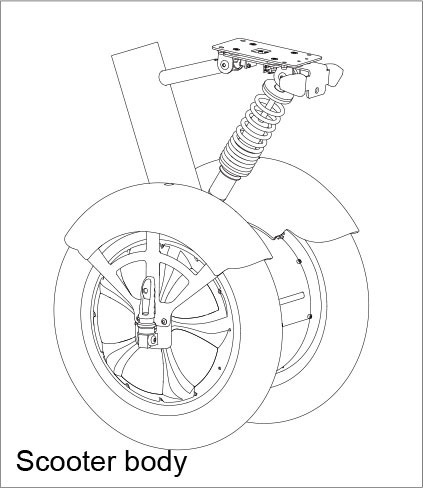
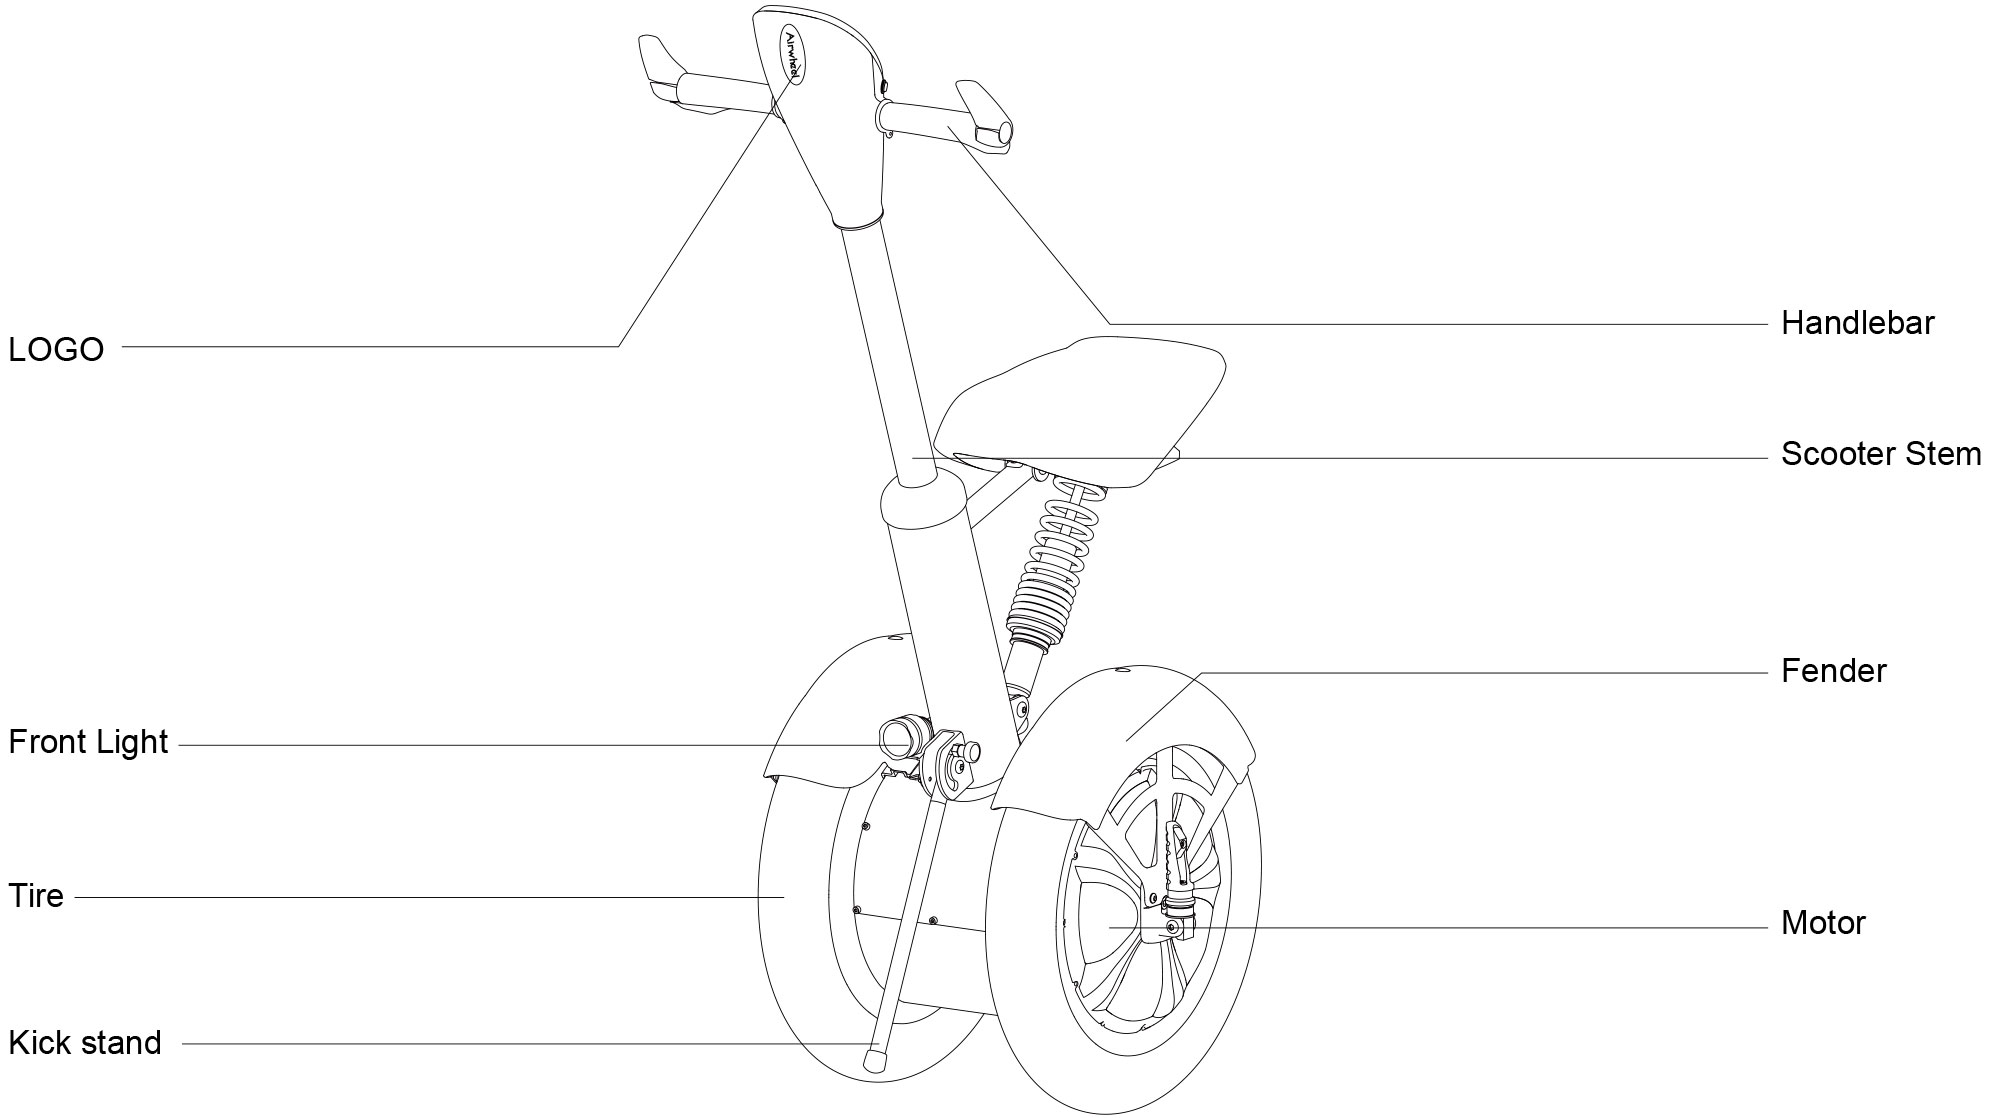
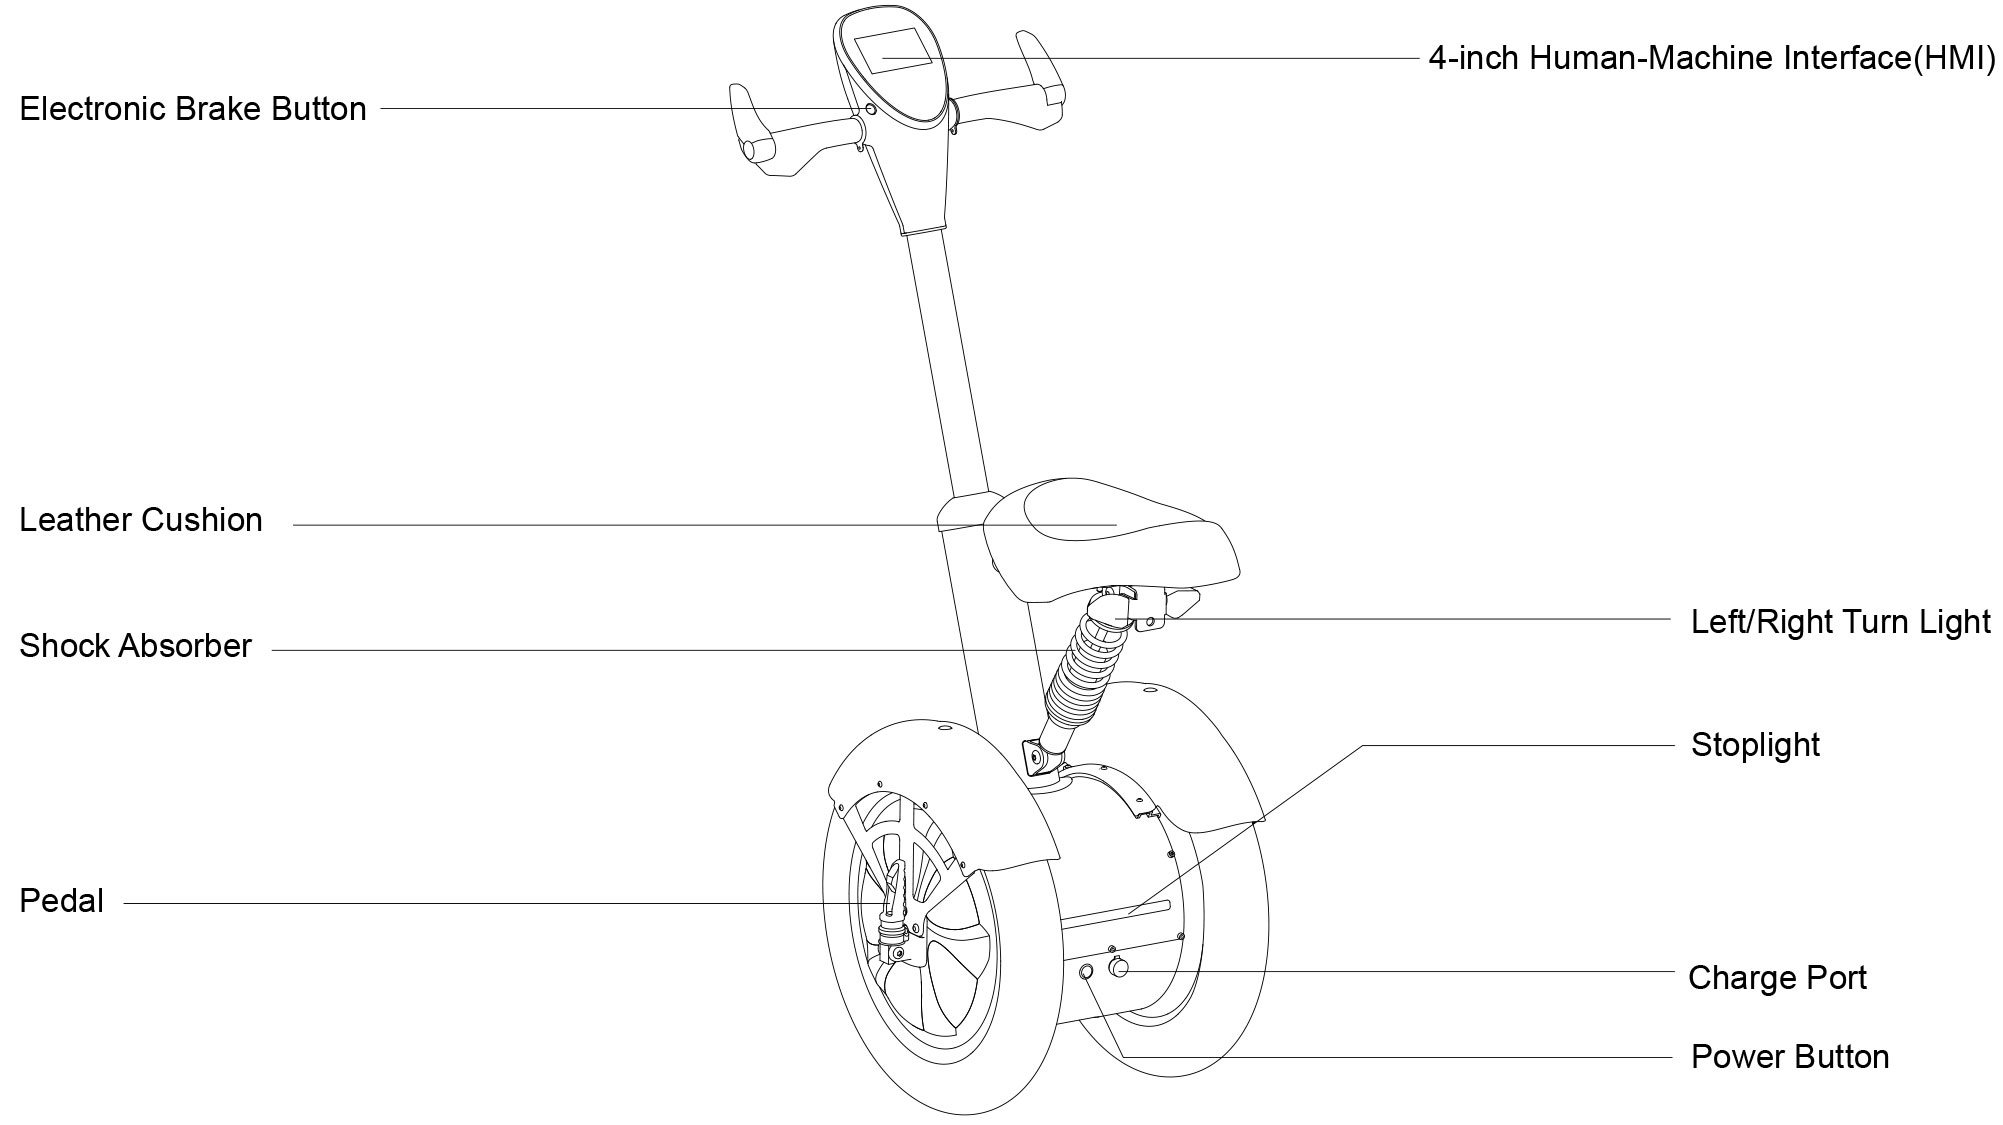
5.1. Components
1. Handlebar
2. Human-Machine Interface (HMI)
3. Motor
4. Scooter Stem
5. Saddle
5.2. Get Started
To get started, adjust the scooter stem of Airwheel A3 to the upright position. Power on the unit before turning on the remote control, and you'll hear a beep prompt to indicate that the unit is ready to use. Put feet on the pedals and start to ride.
In case the scooter stem is biased severely to one side, this indicates Airwheel A3 is not ready to use. Get the unit in proper gyro-balanced state before getting on.
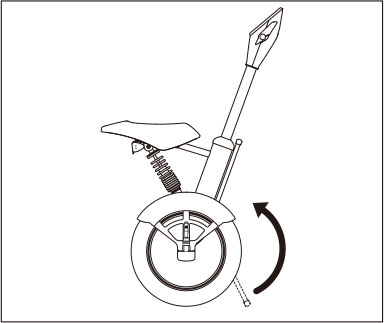
5.3. Kick Stand
Airwheel A3 comes with a kick stand. To park Airwheel A3, pull the knob at the side to release the kick stand.
5.4. Remote Key
6. Maintenance
6.1. Cleaning and Storage
Please clean your Airwheel A3 timely after usage to keep your Airwheel A3 in top shape.
Use a soft wet cloth dipped with alcohol to wipe the main body of the unit.
Use a wet towel to clean the tires and fenders. Then wipe and dry them in flowing air to avoid rust.
For stubborn stains or scratches, you may apply some tooth paste on it and scrub it with a tooth brush repeatedly.
Store Airwheel A3 in a dry and cool place indoor when it's not in use. Expose to sunlight or freezing outdoor environment will lead to accelerating aging of the exterior materials.
6.2. Screw Connection
All of the screws on Airwheel A3 have been specifically processed against loose. Yet for safety concerns, please check connections on the wheel hub, scooter stem, battery case, fender, platform casing and display panel ect. regularly for loosened connection or abnormal noise. In case of any loosened connection, please check the screws on the connection joint and fasten them.
6.3. Tire Pressure
Generally the tire pressure of Airwheel A3 ranges between 2.0~2.2KG/cm2. High tire pressure contributes to smaller friction force and longer battery range, yet delivers less damping effect.
6.4. Transportation and Storage
Please handle Airwheel A3 as per the following steps:
1. Please make sure Airwheel A3 is powered off.
2. Please remove the scooter stem before storing Airwheel A3 in the car trunk.
3. Please ask for necessary help when having difficulty with lifting the unit into the car trunk.
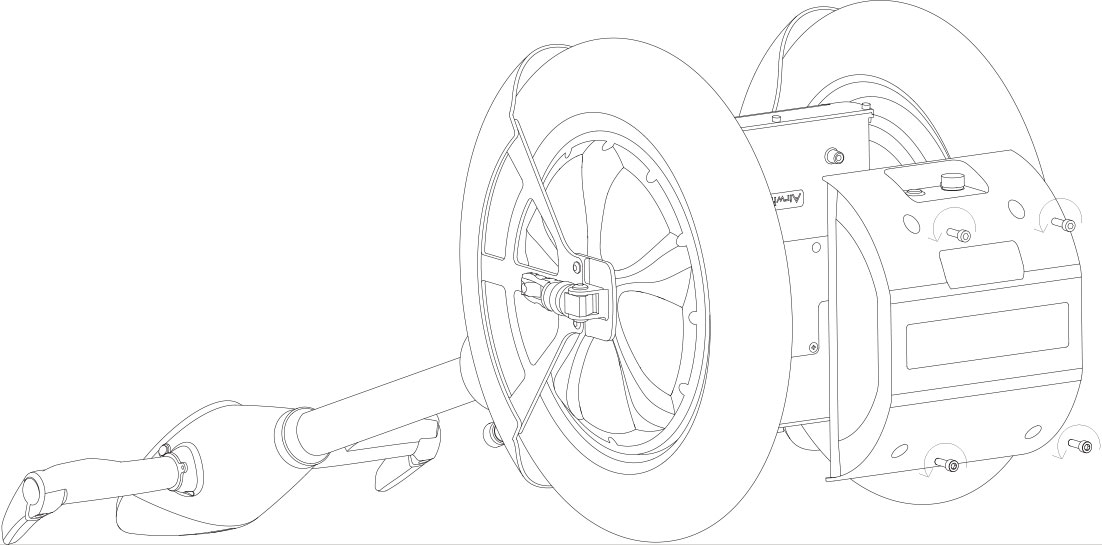
6.5. Remove Battery Pack
Fold up the kick stand and lay flat the unit. Unfasten the four M6*20 hexagon screws with an M5 hexagon wrench. Remove the battery case and take out the battery pack.
![Airwheel A3 two-wheeled scooter]()
Mail us only the battery case if the battery case needs to repair.
7. Limited Warranty
Please retain the warranty and proof of purchase (i.e.receipt). Limited
Warranty Terms (Non-Artificial Damage Only):
After-sales service:
1. 1 year for the main body (one month for wearing parts, i.e. casings and tires).
2. 6 months for the battery.
The following situations will not be covered by the warranty:
1. Malfunction due to misuse.
2. Malfunction caused by unauthorized modifications, disassembling or repair.
3. Accidental damage or malfunction due to improper storage.
4. Discrepant warranty/proof of purchase and product.
5. Exterior damages due to usage.
6. Disassembling parts unspecified by this manual.
7. Damage or malfunction caused by riding on rainy days or dipping in water.
8. Specifications
| Specifications |
Parameters |
Remark |
| Weight |
34kg |
Standard Accessory |
| Speed |
6~ 17km/h |
|
| Max. Climbing Angle |
~ 15° |
Riders weighing 60kg get up to 18° |
| Battery Capacity |
520Wh |
Protection board with SOC equalization |
| Working Temperature |
-10℃ ~40℃ |
Best at 20° ~30° C |
| Max. Load |
120kg |
|
| Charge Voltage |
AC220V 50~60Hz |
Optional:110V/110V-240V |
| Charge Time |
520Wh: ~ 180min |
|
| Size |
Height:1134mm, Length: 720mm, Width: 438mm |
|
| Wheel Size |
16 inches |
|
| Pedal Height |
247mm |
|
| Saddle Height |
740mm |
|
9. Appendix I
The illustration is only for reference, the item is subject to the material object.
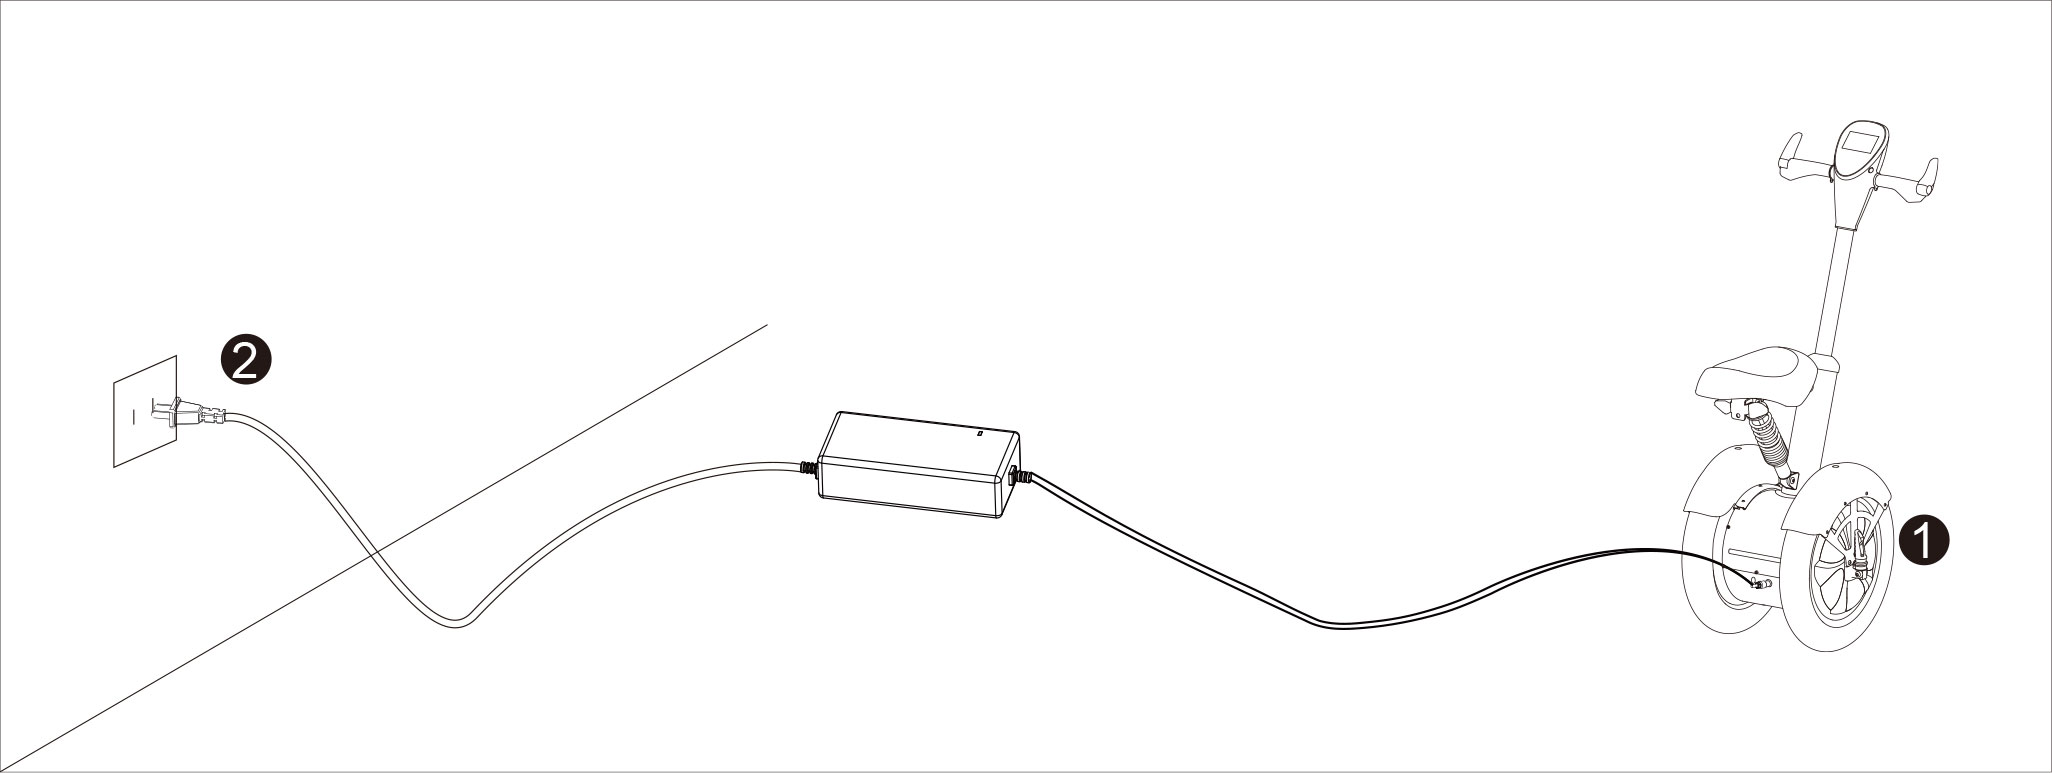
9.2. Charging Notes
Charge Note: Plug Airwheel to the charger before connecting the charger to power supply.
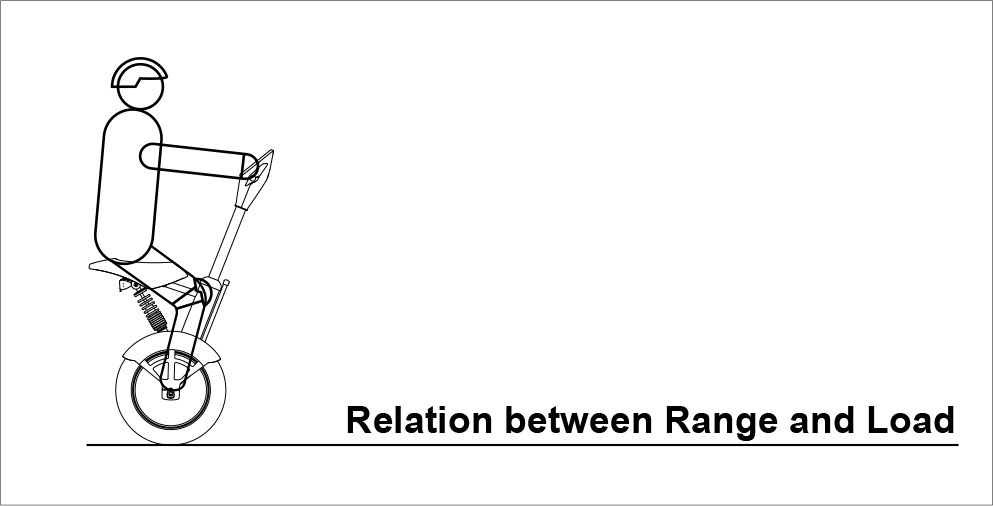
9.3. Relation between Range and Load
Similar to the relations between fuel consumption and cargo load, range per charge is related to rider's body weight. In light of the conclusion we draw from practical tests (rider's weight: 60kg; riding speed: 7km/h and constant; road condition: smooth and flat), range per charge falls by 1.5~2.0km for each additional gain of 10kg.